
Elementary Tote ~ A Tutorial
Elementary Tote : Fresh Lemons Quilts
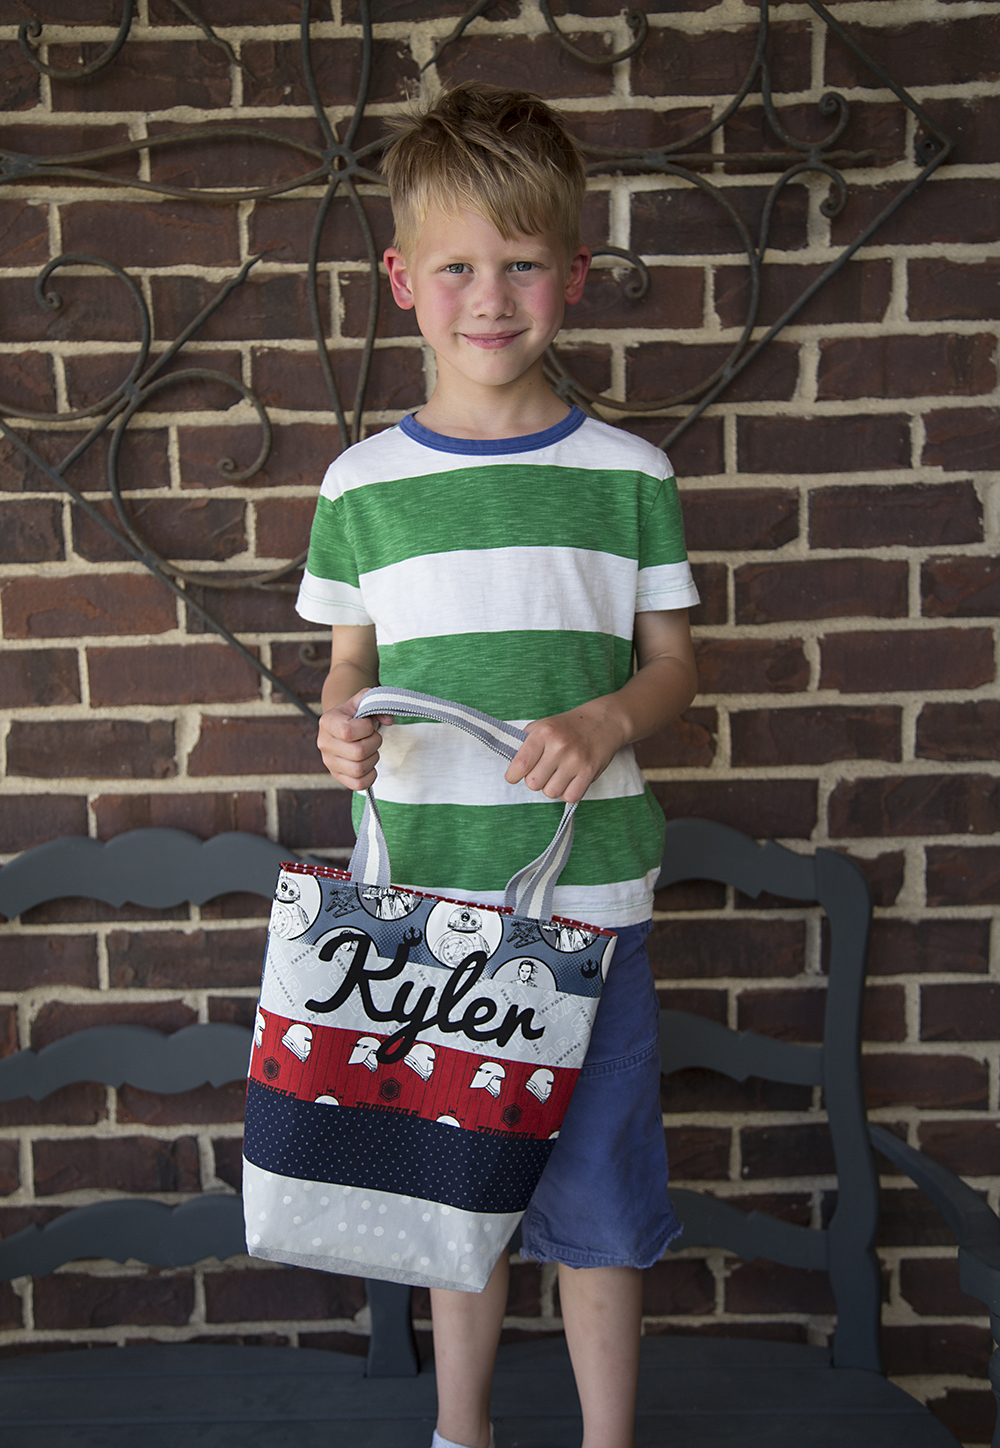
My son is going to a music camp this year at School of Rock. It's the same camp my daughter attended a couple years ago - she loved it. Before she went, I made her a little tote bag that she could use to bring her ear plugs, notepad and snacks each day. My son has not forgotten about this, and told me that he cannot wait to see his bag for class.
I whipped up a little bag for him and I thought I'd share the tutorial with you. I think of it as "Elementary" sized - great for 5 to 10 year olds. (If you are looking for a mom-sized bag, check out my Farmer's Market Tote tutorial.)
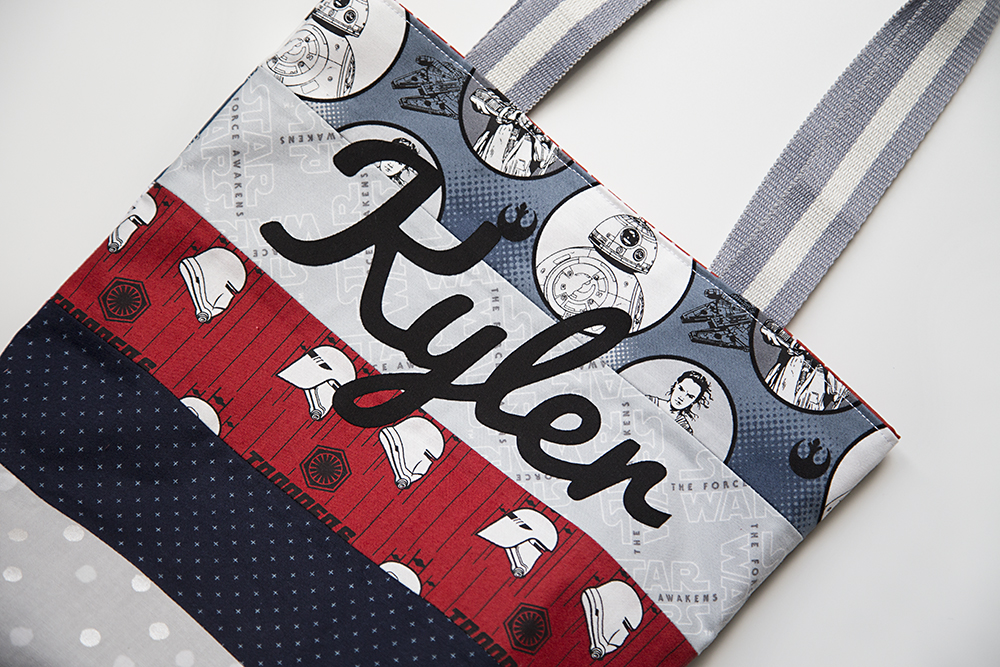
I personalized his tote bag with his name using my Cricut Explore Air (affiliate link). After much trial and error, I finally am successfully cutting fusible fabric with it! I plan on sharing a tutorial later this week with my tips. See my tips in this post!
Elementary Tote
Approximate size: 11-1/2" x 11-1/2"

Elementary Tote Supplies : Fresh Lemons Quilts
Supplies Cut (12) 3" x 13" rectangles for outer tote bag Cut (2) 13" x 15-1/2" rectangles for lining Cut (2) 13" x 15-1/2" rectangles from fusible interfacing, such as Pellon SF101 Cut (2) 20" strips of cotton webbing, around 1" wide
1. Lay out your 3” x 13” rectangles in 2 groups - 6 rectangles for the front of the tote and 6 rectangles for the back of the tote.
Note: The bottom rectangle on each side will end up being on bottom/underside of the tote bag, so you probably don’t want to use your favorite fabric in this location.
2. Using a 1/4" seam allowance, sew each set of the 3" x 13" rectangles together along the long sides, resulting in (2) 13" x 15-1/2" outer tote panels. Press your seams as desired.

Elementary Tote : Fresh Lemons Quilts
3. Following the manufacturer’s instructions, fuse your Pellon SF101 interfacing to the back of the outer tote panels.
4. Cut 2" squares out of the bottom left and right corners of your outer tote panels, as well as your (2) 13" x 15-1/2" lining pieces. This is for your gusset later.

Elementary Tote : Fresh Lemons Quilts

Elementary Tote : Fresh Lemons Quilts

Elementary Tote : Fresh Lemons Quilts
5. Place your outer tote panels right sides together. Using a 1/2" seam allowance, sew down the sides and bottom of the fabric. ** Do NOT sew the cut out squares! **

Elementary Tote : Fresh Lemons Quilts
6. Now it’s time to sew the gussets. If you have never done this before, this is probably the trickiest step.
"Open" up your bag in the corner where you cut the squares, and place the fabric back together matching up the side and bottom sewn seam, as shown.

Elementary Tote : Fresh Lemons Quilts
7. Pin as shown.

Elementary Tote : Fresh Lemons Quilts
8. Sew using a 1/2" seam allowance.

Elementary Tote : Fresh Lemons Quilts
9. Repeat on the other side to make the second gusset.

Elementary Tote : Fresh Lemons Quilts
10. Flip your outer tote shell so the right sides are facing out.

Elementary Tote : Fresh Lemons Quilts
11. Repeat steps 5 - 9 with your lining pieces, with the exception of leaving approximately 5" open/unsewn along the bottom, for flipping the bag right side out later. Leave the lining wrong sides out.
12. Personalize your bag! (Circuit Explore Air Tutorial will be posted on Thursday ~ Stay tuned!) I posted my tips, just click over to this post!

Elementary Tote : Fresh Lemons Quilts
13. Measure and mark the top center of the outer tote shell. Pin your cotton webbing straps approximately 2” to each side of the center marking. Take care not to twist your straps. Baste in place using a 1/4” seam allowance.

Elementary Tote : Fresh Lemons Quilts
14. Place your outer tote shell right side out, into the lining wrong side out, as shown.

Elementary Tote : Fresh Lemons Quilts
15. Pin along the top of the bag, and sew together along the entire top, using a 1/2" seam allowance.

Elementary Tote : Fresh Lemons Quilts
16. Flip your bag right side out through the opening in the bottom of the lining. Stitch the bottom of your lining closed.

Elementary Tote : Fresh Lemons Quilts
Push the lining into the outer tote shell.
17. Press your bag and top stitch around the top.

Elementary Tote : Fresh Lemons Quilts
You are finished! Gift your bag to your favorite person. :)
Elementary Tote : Fresh Lemons Quilts