Solstice Stars Series : Ribbon Star
Welcome to the Solstice Stars Series! Today is the first week of a series of five star quilt block tutorials. Our first block is the Ribbon Star. This star is from Barbara Brackman's book The Encyclopedia Of Pieced Quilt Patterns,page 160 and the original source of the design is unknown.
Ribbon Star Quilt Block Tutorial
Please note, all seams are 1/4"; Final block size 12.5" unfinished
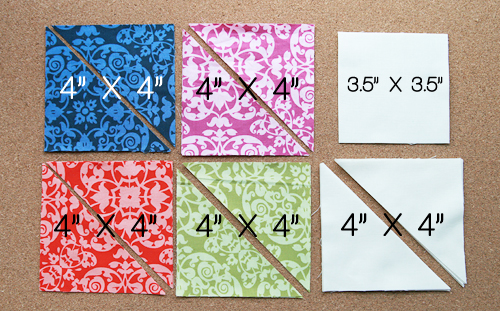
Step 1. Cut your fabric:
| Pattern Piece | Fabric Color | ||
| Background Corners | Cut 4 | 3.5” x 3.5” | White |
| Background Half Square Triangles | Cut 6 | 4” x 4” | White |
| Top Left Points | Cut 2 | 4” x 4” | Blue |
| Top Right Points | Cut 2 | 4” x 4” | Purple |
| Bottom Left Points | Cut 2 | 4” x 4” | Red |
| Bottom Right Points | Cut 2 | 4” x 4” | Green |
Take all of your 4" x 4" squares and cut them diagonally into half square triangles. Set aside one of each of your blue, purple, red and green half square triangles. You will only need 3 of each color for your star.
Step 2. Sew each of your remaining 12 colored half square triangles to your 12 background/white half square triangles, creating 12 squares.
Step 3. Trim your squares to 3.5".
Tip: I like to use a small quilting ruler with a diagonal line, and line that up with the seam. I then trim the top and right of the block. Turn the block 180 degrees and line up the seam again. Trim the remaining sides of the square to 3.5".
Lay out your resulting squares into the design of the quilt block, using your 3.5" background/white fabric for the corners.
Step 4. Sew your squares together. You're done!
Don't forget to post pictures of your finished blocks, as well as any questions, in the Flickr group!


